
One stern down and another to go!

The second stern build was faster and easier in every way, since we could template the mold from the new staircase and starboard hull sides to create an already fair set of curves. This started with tape and waxing of the various shapes to be molded, followed by a layer of water-soluble PVA (polyvinyl alcohol) as a release layer.


Gelcoat was added next. For this we went to colors of the spectrum on top of the white gelcoat to add visual layers for detecting voids in the layup.


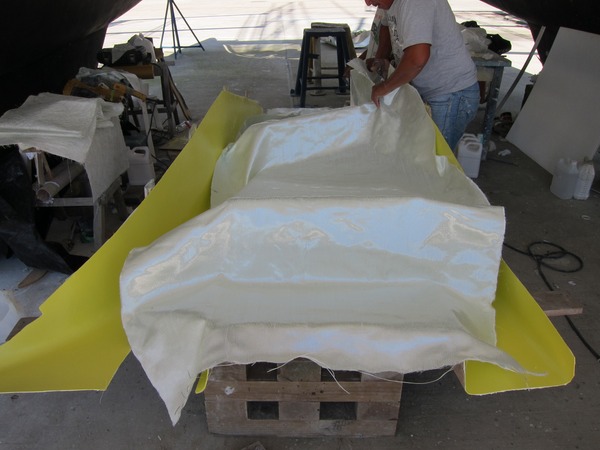
Layers of chopped strand mat were then added and cured quickly in the hot sun...
...first to the extended port staircase


...then the curved starboard side hulls


... and lastly the elongated port hull bottom.
These pieces could be easily released using water under the glass mat to dissolve the PVA and the resultant shapes fit together and onto the original stern perfectly to form the new mold.


Of course, not everything goes so easily... Mark might see a problem developing downstream to something being worked on in the moment. It could be challenging to correct this on the spot when momentum took its course, so sometimes he had to just walk-away and let it happen only to correct it later.

Two additional pieces had to be added for the extra stern length and one of these gave us problems by bulging out of shape.
It eventually became apparent to all once the full mold sides were being added, but it was easy enough to cut-off and re-glass a new piece on.

It still amazes me what you can do with fiberglass. After fitting all of the pieces together with wood, glassing them together and removing the screws ~ there we had a starboard mold with a perfect fit! All of that shaping (think Frankenmold) and fitting (plenty of "torture") was not needed this time around because the measurements matched.


Wood stringers were glassed onto the mold to strengthen the shape for the final layup.
Mark was fascinated that the scrap wood we were using was from teak boards.
In most contexts this is a valuable wood, yet it grows across Guatemala and must be in surplus.

All of this hard work went on in steaming hot weather in-between torrential downpours and beating sun.

One day, contractors came by to measure the metal structure in which we're parked to prepare for a covering.
This will make a good paint shed and allow shade from the sun and rain, but it will come too late to help us.

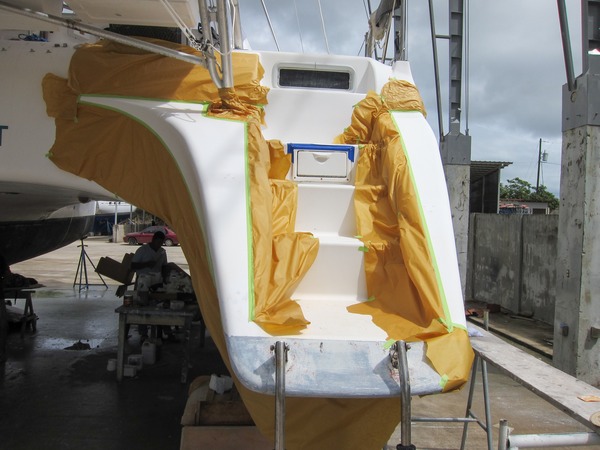
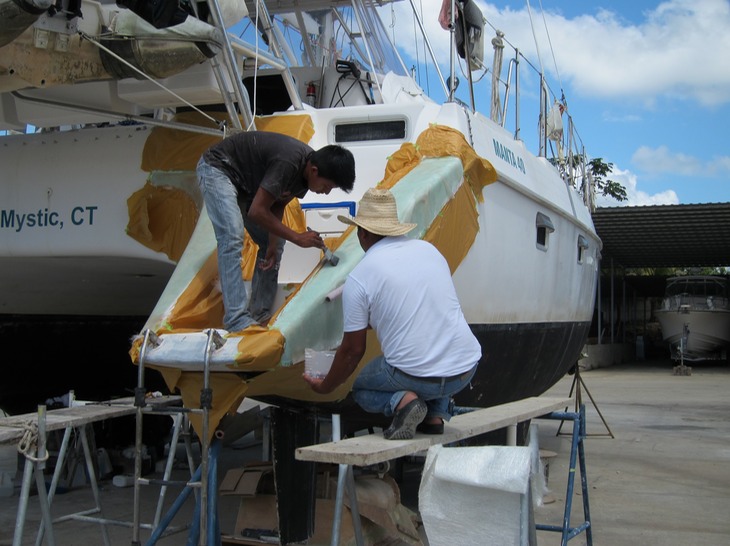
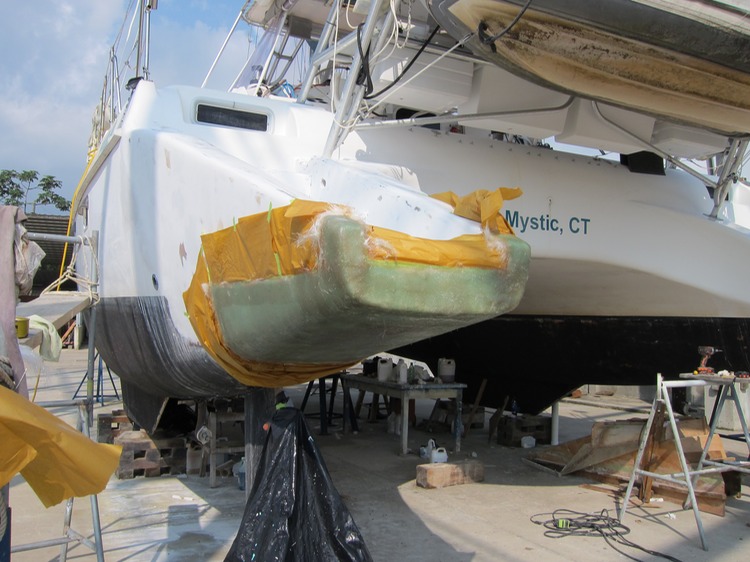
At least the bridge-deck of Reach provided a little shade for some of the work. The mold was complete and the first layers of gelcoat started. A layer of bright yellow detector coat was applied on white for good measure prior to the glasswork.

The layup of the bottom hull and new stern took place over 2 days while Michele was in the City on a provisioning trip.


The result was a beautifully shaped new stern right out of the mold!


Each of the final details went like clockwork.
In one day, the bulkhead was laid-up, metal backing plates and nidacore steps were glassed into the mold and dorade air vents drilled and installed.


This team works like a highly efficient machine by now.

Less than two weeks after the mold was started, we are ready to glue the stern to Reach!
